Converting Books Into Visual Novels Part 2±0.5: An Image Prompting and Processing Guide
Jun 04, 2026
This is the fourth (or perhaps fifth) in a series of posts explaining my processes for how I convert books into visual novels. See the full series links over on the website's README.md.
This post will attempt to document, at a high-level, how the actual image generating and processing works — how to go from character and background text description to VN-ready .avif file.
(Full details behind the why of these processes will have to wait for subsequent entries in the series, but there should be sufficient-enough detail here to at least get started prompting images in the Public Domain Pulp desired style.)
The Prompts
Currently, all the image generating for Public Domain Pulp is done using Google's Nano Banana Pro model. It's the model that outputs the best results in a suitable style for the VN-conversion task (at time of writing), and it's therefore what the prompts and reference images have been optimized around.
(GPT Image 2 is arguably the better-looking model overall for general use, but it has a couple deal-breaking idiosyncrasies when it comes to the site's cross-hatching style. In the future though, it may be the preferred model, though switching would likely require reworking some of the prompting approaches.)
Base Character Prompting
For generating a character base sprite, use this prompt (feeding in these two character style reference images: c-example-1.jpeg and c-example-2.jpeg):
I need you to generate a character sprite for a book character. The style of the character sprite I want generated is a sort of literary illustration style, which I've included a couple examples of for helping guide the output image. The output should follow the style of those examples, but use period-accurate and character-accurate imagery/clothing/etc based on the provided setting and character description and so forth. The image shouldn't have any background art — the background should be of plain paper-like coloring as in the example — and the character shouldn't be holding anything unless specified. The character (which should also have the same plain coloring) should be looking at the viewer, have body posture towards the viewer, and have a neutral expression unless otherwise specified. The illustration should make strong use of hatching/cross-hatching in its style and shading. The illustration should have be cut off at the legs at the bottom.

This particular book is {bookstring}

The particular character is {characterprompt}
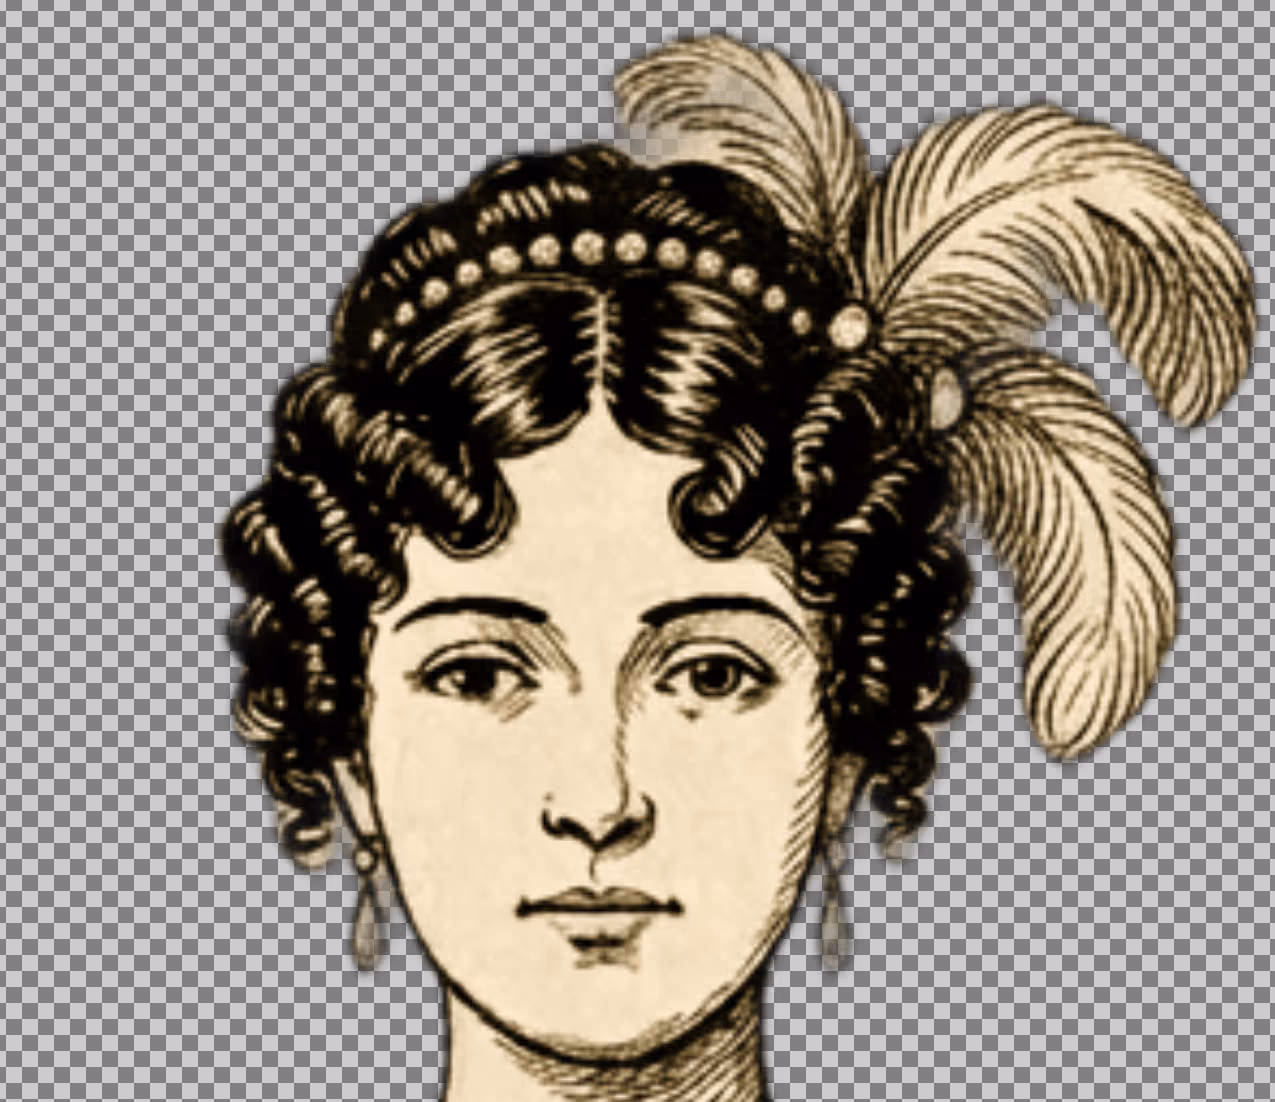
For example:
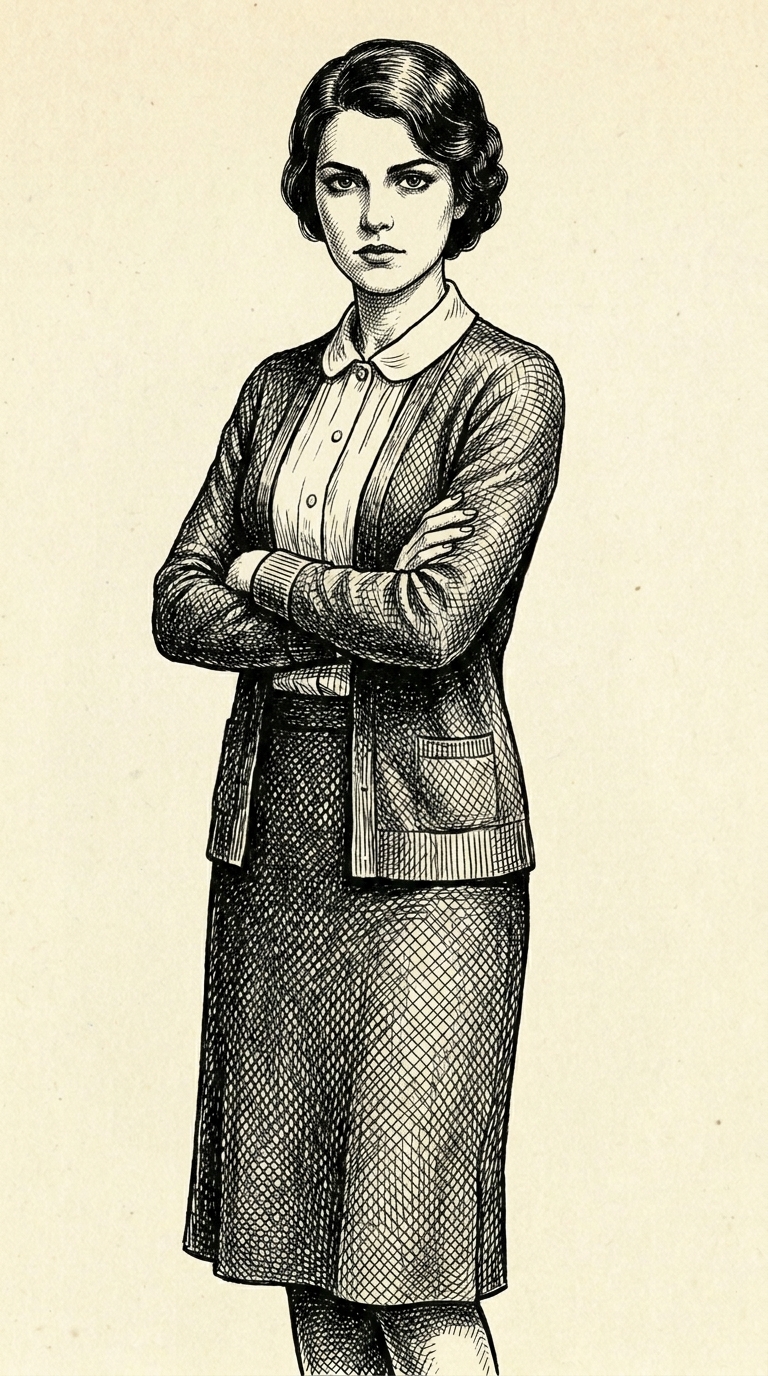
I need you to generate a character sprite…

This particular book is *Pride and Prejudice* by Jane Austen, set in England around 1800.

The particular character is 20-year-old Elizabeth Bennet, attired in her light evening dress, wearing long gloves, hair (of medium-shaded hatching) done up in a regency-style bun, with a curled strand on either side. She should have prominent lashes.

# result saved off as c-lizzy.jpeg
Character generation should use the 9:16 aspect ratio at 1K resolution, resulting in image outputs of 768x1376 pixels. (And if you're quick at math, you'll notice that that pixel resolution is not actually an exact multiple of 9:16, which is a little confusing, and did bite me at one point.)
Character Variation Prompting
For generating a character sprite variation, use this prompt (feeding in a previously generated character sprite as the reference image):
I need you to take this character sprite and make and update to it, while keeping the character the same person, and also the art style (literary hatching drawing w/ paper-colored empty background) the same, and also maintaining period-/setting-accuracy for the character. The update should not add anything to the background. The update should also not change or add anything that the character is holding unless specified.

This particular book is {bookstring}

The update is to {updateprompt}
For example, for an outfit variation:
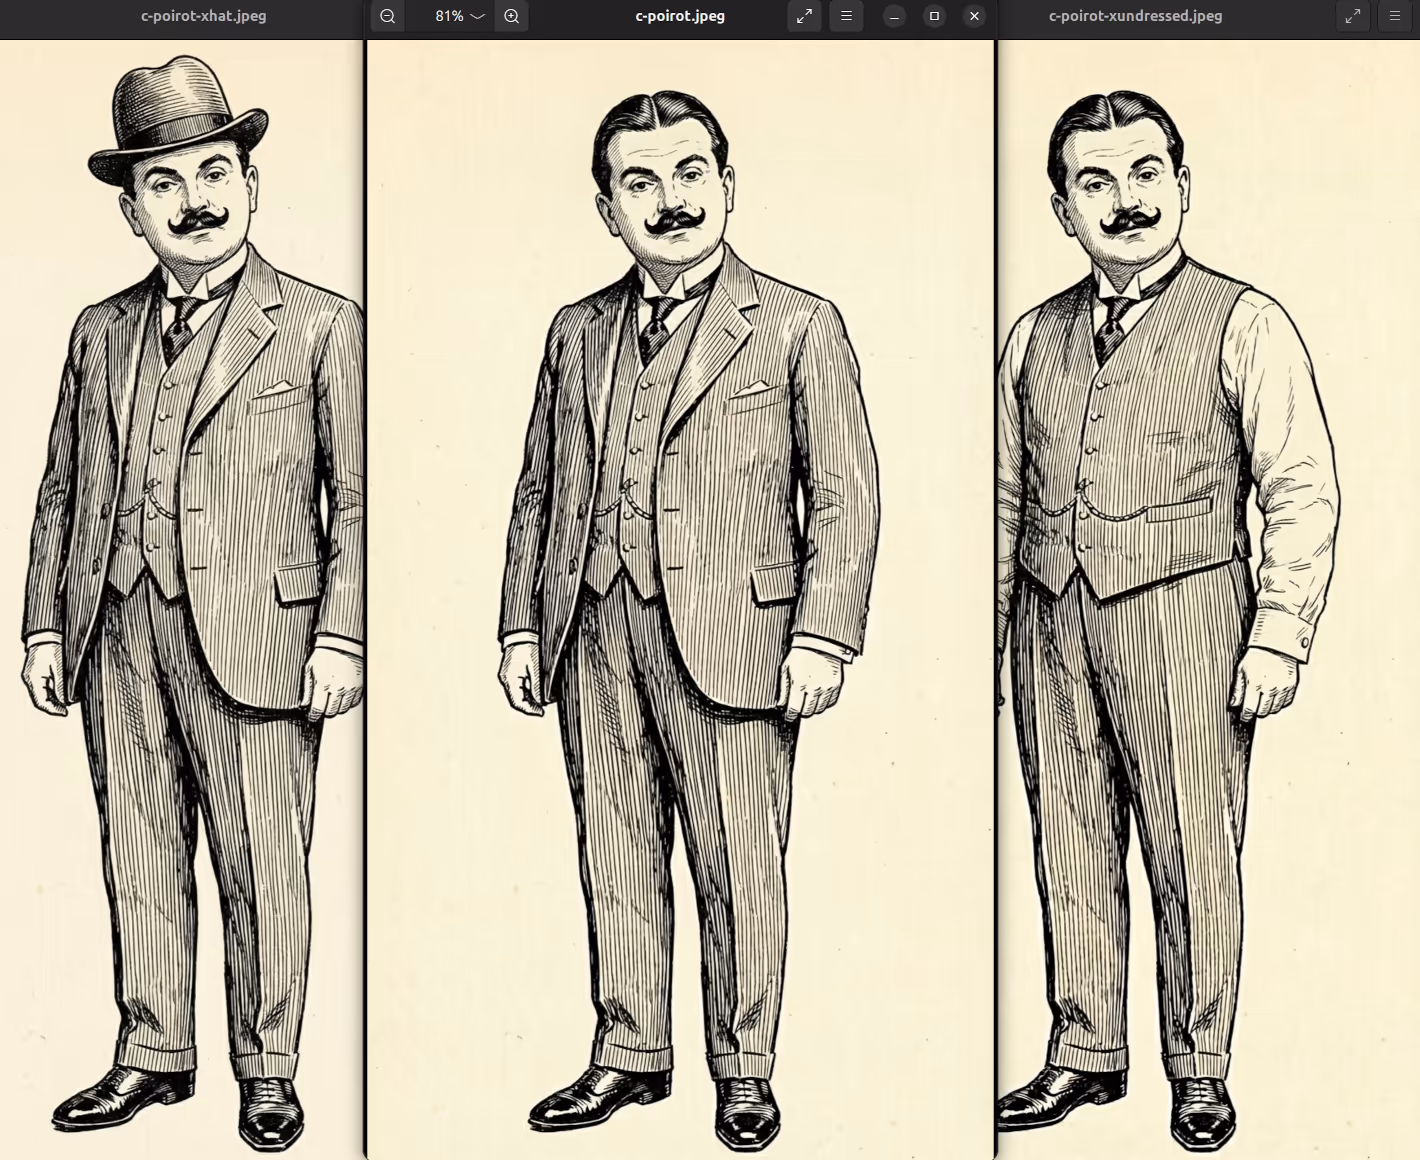
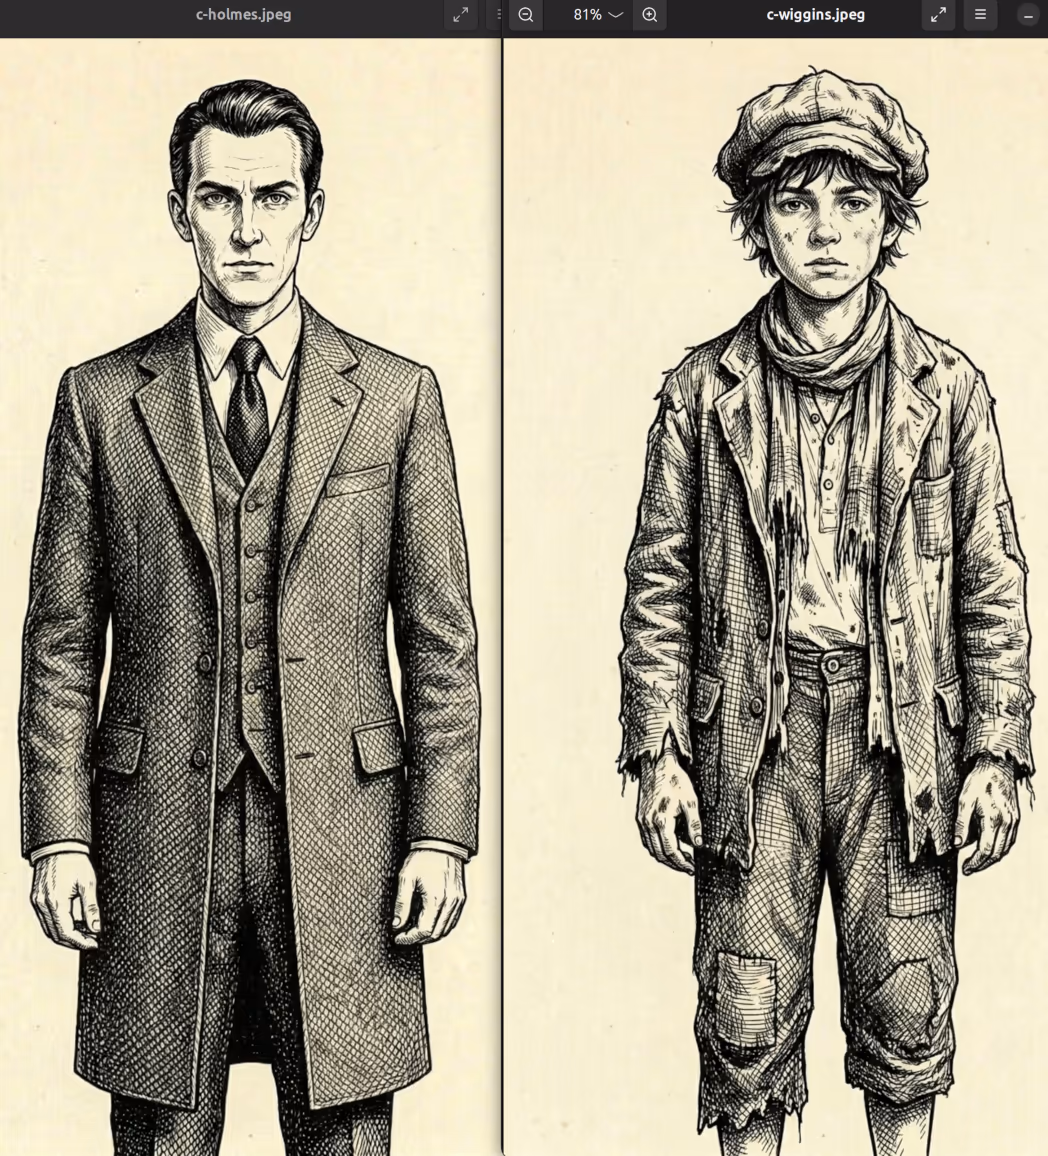
I need you to take this character sprite…

This particular book is *Pride and Prejudice* by Jane Austen, set in England around 1800.

The update is to change the sprite to have the character be wearing outdoor clothing on top of her existing clothes: a darker-hatched pelisse and a straw hooded bonnet, with some simple flower ornamentation on the ribbon on top. (Have the bonnet facing the same direction she's looking, straight-on.)

# result saved off as c-lizzy-xbonnet.jpeg
And a visual example of the base sprites you might end up with:
And another example, for an expression variation:
I need you to take this character sprite…

This particular book is *Pride and Prejudice* by Jane Austen, set in England around 1800.

The update is to change the sprite to have the character's expression be thinking/contemplative, with mouth open slightly, as if speaking quietly.

# result saved off as c-lizzy-ethinking-s.jpeg
And a visual example of all the many expression variations off the base sprites you can end up with (noting how expressions produce many many more sprites!):

Base Background Prompting
For generating a new background, use this prompt (feeding in this background style reference image: b-example.jpeg):
I need you to generate background art for a book. The style of the background I want generated is a sort of literary illustration style, which I've included an example of for helping guide the output image. The output should follow the style of that example — using its paper-like coloring — making sure to use period-accurate imagery/clothing/etc based on the provided setting and so forth. The background should not have any people or writing in it unless specified. The illustration should make strong use of hatching/cross-hatching in its style and shading, using clean lines.

This particular book is {bookstring}

The particular background is {backgroundprompt}
For example:
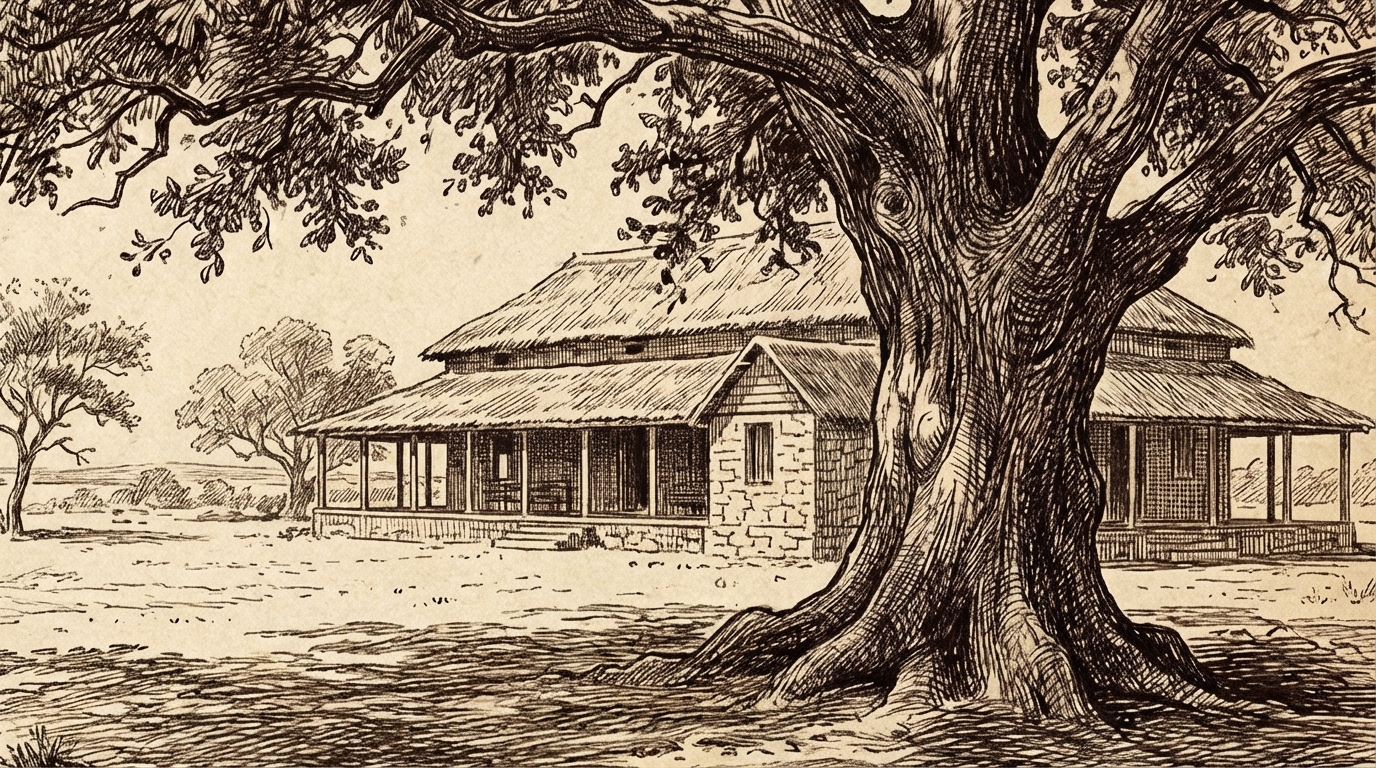
I need you to generate background art…

The particular book is *The Secret Garden* by Frances Hodgson Burnett, set in India and then England at the turn of the 20th century.

The particular background should an interior of Mary's bedroom a the manor, a curious, gloomy, yet grand room. The view should be looking towards the walls, covered in antique tapestry depicting a forest scene featuring fantastically dressed people, animals, and the distant turrets of a castle. There's a deep window with leaded panes (outside the window should be opaque/abstract lines). The furniture is heavy and dark, creating an imposing and isolating atmosphere. The view should be from the bed, under its posts and coverings.

# result saved off as b-manor-mary.jpeg
Background generation should use the 16:9 aspect ratio at 1K resolution, resulting in image outputs of 1376x768 pixels.
Background Variation Prompting
For generating a background variation, use this prompt (feeding in a previously generated background as the reference image):
I need you to make an update to a piece of background art for a book, styled in literary illustration style, with paper-like coloring, period-accurate imagery/clothing/etc, and strong use of hatching/cross-hatching in its style and shading.

For context: the particular book is {bookstring}

The update is to {updateprompt}
For example:
I need you to make an update…

For context: the particular book is *The Secret Garden* by Frances Hodgson Burnett, set in India and then England at the turn of the 20th century.

The update is to make the scene outside the window(s) nighttime by adding dense hatchings throughout the sky, representing the darkness. The objects outside should also be made darker with hatchings.

# result saved off as b-manor-mary-night.jpeg
And here's a visual example of a background and a simple variation on it:

Image Commands
The above prompts, done for all the character sprites and backgrounds throughout a book, will produce a set of initial unprocessed reference images. The next step is to run commands on these images to make them VN-ready:
Character Commands
For characters, we need to do three things:
- Normalize colors
- Remove backgrounds
- Apply compression
The base commands for that, looping over all character files in a directory, are (feeding in this color palette reference image: pC.png):
for f in c-*.jpeg; do
    [ -e "$f" ] || continue
    out="../images/${f%.*}.avif"
    if [ -e "$out" ]; then
        echo "Skipping $f (already have $out)"
        continue
    fi
    outpng="pngsc/${f%.*}.png"
    rm "$outpng"
    convert "$f" pC.png -fx "v.p{u.r*v.w, u.intensity*v.h}" temp.png
    rembg i -m isnet-anime -om temp.png mask.png # that model… how embarrassing
    convert temp.png mask.png -alpha off -compose CopyOpacity -composite "$outpng"
    avifenc -q 50 --qalpha 50 -s 2 -y 444 "$outpng" "$out"
    rm temp.png
    rm mask.png
    echo "$out"
done
…Where convert is ImageMagick and rembg is this python utility: https://github.com/danielgatis/rembg.
Note how we generate both a final .avif file — the file type we'll actually end up using in the VNs — but also an intermediate .png file, prior to compression. We want this intermediate file such that we can make manual edits later on, as-needed. (Doing this to the already-compressed file would be lossy for each edit we made, as compared to re-compressing off the uncompressed one after each new edit.)
Background Commands
For backgrounds, we need to normalize colors and apply compression as with the character sprites, but we can skip the background-removal step.
The commands to run therefore become (still using pC.png):
for f in b-*.jpeg; do
    [ -e "$f" ] || continue
    out="../images/${f%.*}.avif"
    if [ -e "$out" ]; then
        echo "Skipping $f (already have $out)"
        continue
    fi
    outpng="pngsb/${f%.*}.png"
    rm "$outpng"
    convert "$f" pC.png -fx "v.p{u.r*v.w, u.intensity*v.h}" "$outpng"
    avifenc -q 50 -s 2 -y 444 "$outpng" "$out"
    echo "$out"
done
Again, we generate both the intermediate .png and a final .avif, with the compressed .avif being the only one that actually gets committed to source.
Quick Explanations
While the full best-practice details of the image generation processes need to be left for the "Part 3: Character Sprite Generation" and "Part 4: Background Generation" posts, there are a few high-level considerations that ought to be fleshed out at least partially here:
File Formats
Even though the image pipeline moves through three different file types throughout the process — the initial .jpeg, the intermediate .png, and the final .avif — it's only that final one that gets committed to source. We don't want multiple versions of the same files committed, since that'd be a waste of space. We only want the final compressed copies.
Also: although the more recent VNs use .avif at quality=50 for their image compressions, earlier VNs used .webp files instead, at q=25. The reason the latest ones switched away from .webp is that that file format was found to be producing ugly off-color artifacts in the tans of the cross-hatching style at a very high frequency, and there wasn't a good way to get rid of those without cranking up the quality to unreasonably bloated levels.
Character Sizing
Since all character use the same 1376x768 pixel resolution for their sizes (expect for a few unsuccessful experimental cases in Pride and Prejudice), there are some factors around character height that need considering.
To start: height needs to take into account the tallest version of a sprite that needs to exist, which usually means taking into account any hatwear they might have on in their various outfits. If, for example, a character has a variation without a top hat, and another with a top hat, the one with the top hat should be generated first, and then removed via the character update prompt, and not the other way around. (Since otherwise, the character update would have to shrink the character in order to fit the top hat, which would result in their sizing being inconsistent.)
Also: because characters are different heights, earlier VNs had a problem wherein the tallest characters would end up at lower, crummier effective resolutions, since in order to accommodate their full bodies, their heads would need to be a smaller size in terms of pixels, which when blown up, would looks bad and inconsistent compared to shorter characters, especially children sprites.
The solution for this (after many failed alternate approaches) was to simply stop having the sprites be full-body, and instead just have the sprites generate from the legs up. This works well-enough because "legs-up" leaves wiggle room for how much of the legs to show, such that taller characters can cut off at a higher point and shorter characters at a lower one, leaving heads more consistently sized (if still not perfectly consistent):
Since the bottoms of the legs aren't ever really seen anyway in the VNs, this also has the bonus of just dedicating more overall image pixel size to the portions of the images that actually matter, bumping up character resolutions all-around (though also: file sizes too).
Color Normalizing
The ImageMagick convert color command collapses all colors down to a palette that looks like this:
# magick command:
convert -size 256x256 xc:white -sparse-color Bilinear '0,%[h] #311c00  %[w],0 #dcb362  %[w],%[h] #fff2e0 20,20 black' pC.png
This has two effects. First off, it tends to slightly increase the contrast of the images by making the base tans slightly lighter and the black hatching lines slightly darker, which helps make the visuals pop out a bit more.
Second, and more important, the palette-collapsing helps make the images look like they belong together, as a consistent set. Without this normalization, individual images like backgrounds can get a little "creative" with their interpretation of "paper-coloring", and for example give too-deep of oranges to fires, or put greens on leaves, or blues in the sky; all of which would look fine in isolation, but it would be distracting to have some images colored thusly, while others aren't.
It should be noted though that the v.p{u.r*v.w, u.intensity*v.h} color formula used for the normalization is a little weird in that: while it takes into account the source image's red and green channels, it completely ignores blue. This only works for input images that are already close-enough to the desired paper-coloring, which is usually fine, because usually the image generator creates something within the ballpark of the palette, but for wildly off images, this normalization will produce weird/undesirable results.
(Also: sometimes we do actually want off-palette colors in special situations that intentionally pop out, like the green light in Great Gatsby or bloods in murder backgrounds. But even for those cases, generally we still want to apply the normalization, and then just layer the normalized coloring on top of the original, and then fiddle with transparency masks to just unmask the parts of the image where we want the special coloring.)
Background Removal
Would that we could just use character sprites as they're generated, they would be much lower cost to make more of on the margin. However: most character sprites wind up requiring some level of background removal cleanup, especially around the ears and hair. (And the more complex the boundary of the hair, the more complex the cleanup.)
Initially, I was having rembg do the background removal and have it output the adjusted image directly. However, this proved to be a burden for many sprites, since rembg also darkens the border pixels between background and foreground, which theoretically makes for smoother transitions between those areas. But: in the areas where it gets the foreground wrong, treating it incorrectly as background, this has the effect of removing colors, necessitating pulling out the original image, layering it on top of the background-removed one, and fiddling with the masks of both layers.
By instead using the approach of having rembg just output a mask and then applying that mask directly to the original image — no color changes involved — the sprites wind up much easier to clean up as-needed, since it's only a matter of working with the one layer's mask, wiping out false-positive foregrounds and restoring false-positive backgrounds.
Background removal is therefore not as time-intensive as it used to be previously, but definitely still somewhat of an annoyance for large character batches. (And there's no good way yet to have image generators directly output background-removed sprites, nor does there appear to be any better automatable removal tool than rembg.) Therefore, consideration must be given to character sprite quantity and complexity beyond just the cost of the initial prompting.
Curation
As you can tell, the common denominator of all these considerations is: consistency, consistency, consistency.
It's easy to quickly generate lots of images, but it's hard to make them look consistent, while also keeping them good-looking and accurate. Image generations require many iterations to get acceptable results out of.
So, while the above prompts and references and commands and tips should help in getting images that fit the overall Public Domain Pulp theme, they are by no means a guarantee! Manual curation is an absolutely necessary step of the overall generation process, which can include thinking about image appearances at the metadata level.
More details on all that to come…